
Making candles with a 3D printer
Earlier this year I realized I had a bag of beeswax sitting around from that time I made bacon candles. I also had a 3D printer that I had acquired earlier during the pandemic. Also courtesy of the pandemic: some free time. Put those together, and what do you get? Custom molded candles!
How it works (or mostly works)
One of the properties that makes good candle wax is its low melting point. After all, you want it to melt when near the flame on a wick so it can be pulled up said wick by capillary action and burn. Wikipedia says about 64 °C for beeswax. The basic steps:
- design a mold for your model
- print the mold
- heat up wax in a double boiler until it melts
- pour molten wax into the mold
- wait for the wax to harden
- remove the mold and revel in your waxy creation
Before getting too far in, though, it’s worth checking that this plan is at least moderately sane. PLA prints somewhere around 200 °C but softens around 60 °C, but that shouldn’t be an issue unless the mold is already really hot when pouring wax. If the mold is a reasonable temperature, the wax will cool fast enough as the mold heats up that the mold won’t get hot enough to really deform.
Designing the mold
This turned out to be harder than I expected, though once I figured out the process it became much simpler. I decided to start off making a mold of everyone’s favorite Sith lord, or at least his head. I started off wih a scanned model from a Vader bust and cut away everything below the head in Blender. I managed to make a rudimentary mold though using boolean modifiers to non-destructively slice up the whole mold, and to add pins and holes to hold the pieces together.
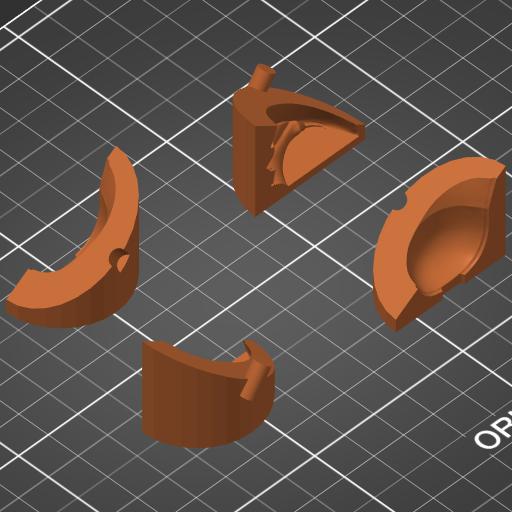
I printed a couple of test versions to iterate on the pins and pour hole on the top before actually heating up any wax. Once I had a reasonable design, I melted some wax and poured it in. Unfortunately I didn’t wait long enough and Vader got kind of squished by being extracted while warm. That’s okay, easy enough to solve that: put him in the fridge before attempting removal.
Blender is great for 3D modelling
After quite a bit of ~fighting~ experimenting, I figured out that Blender is absolutely the wrong tool for what I was trying to do, which is embedding the model in a cylinder and then cutting it up.
I switched to OpenSCAD since it’s really good at exactly this sort of procedural thing (it has for loops!).
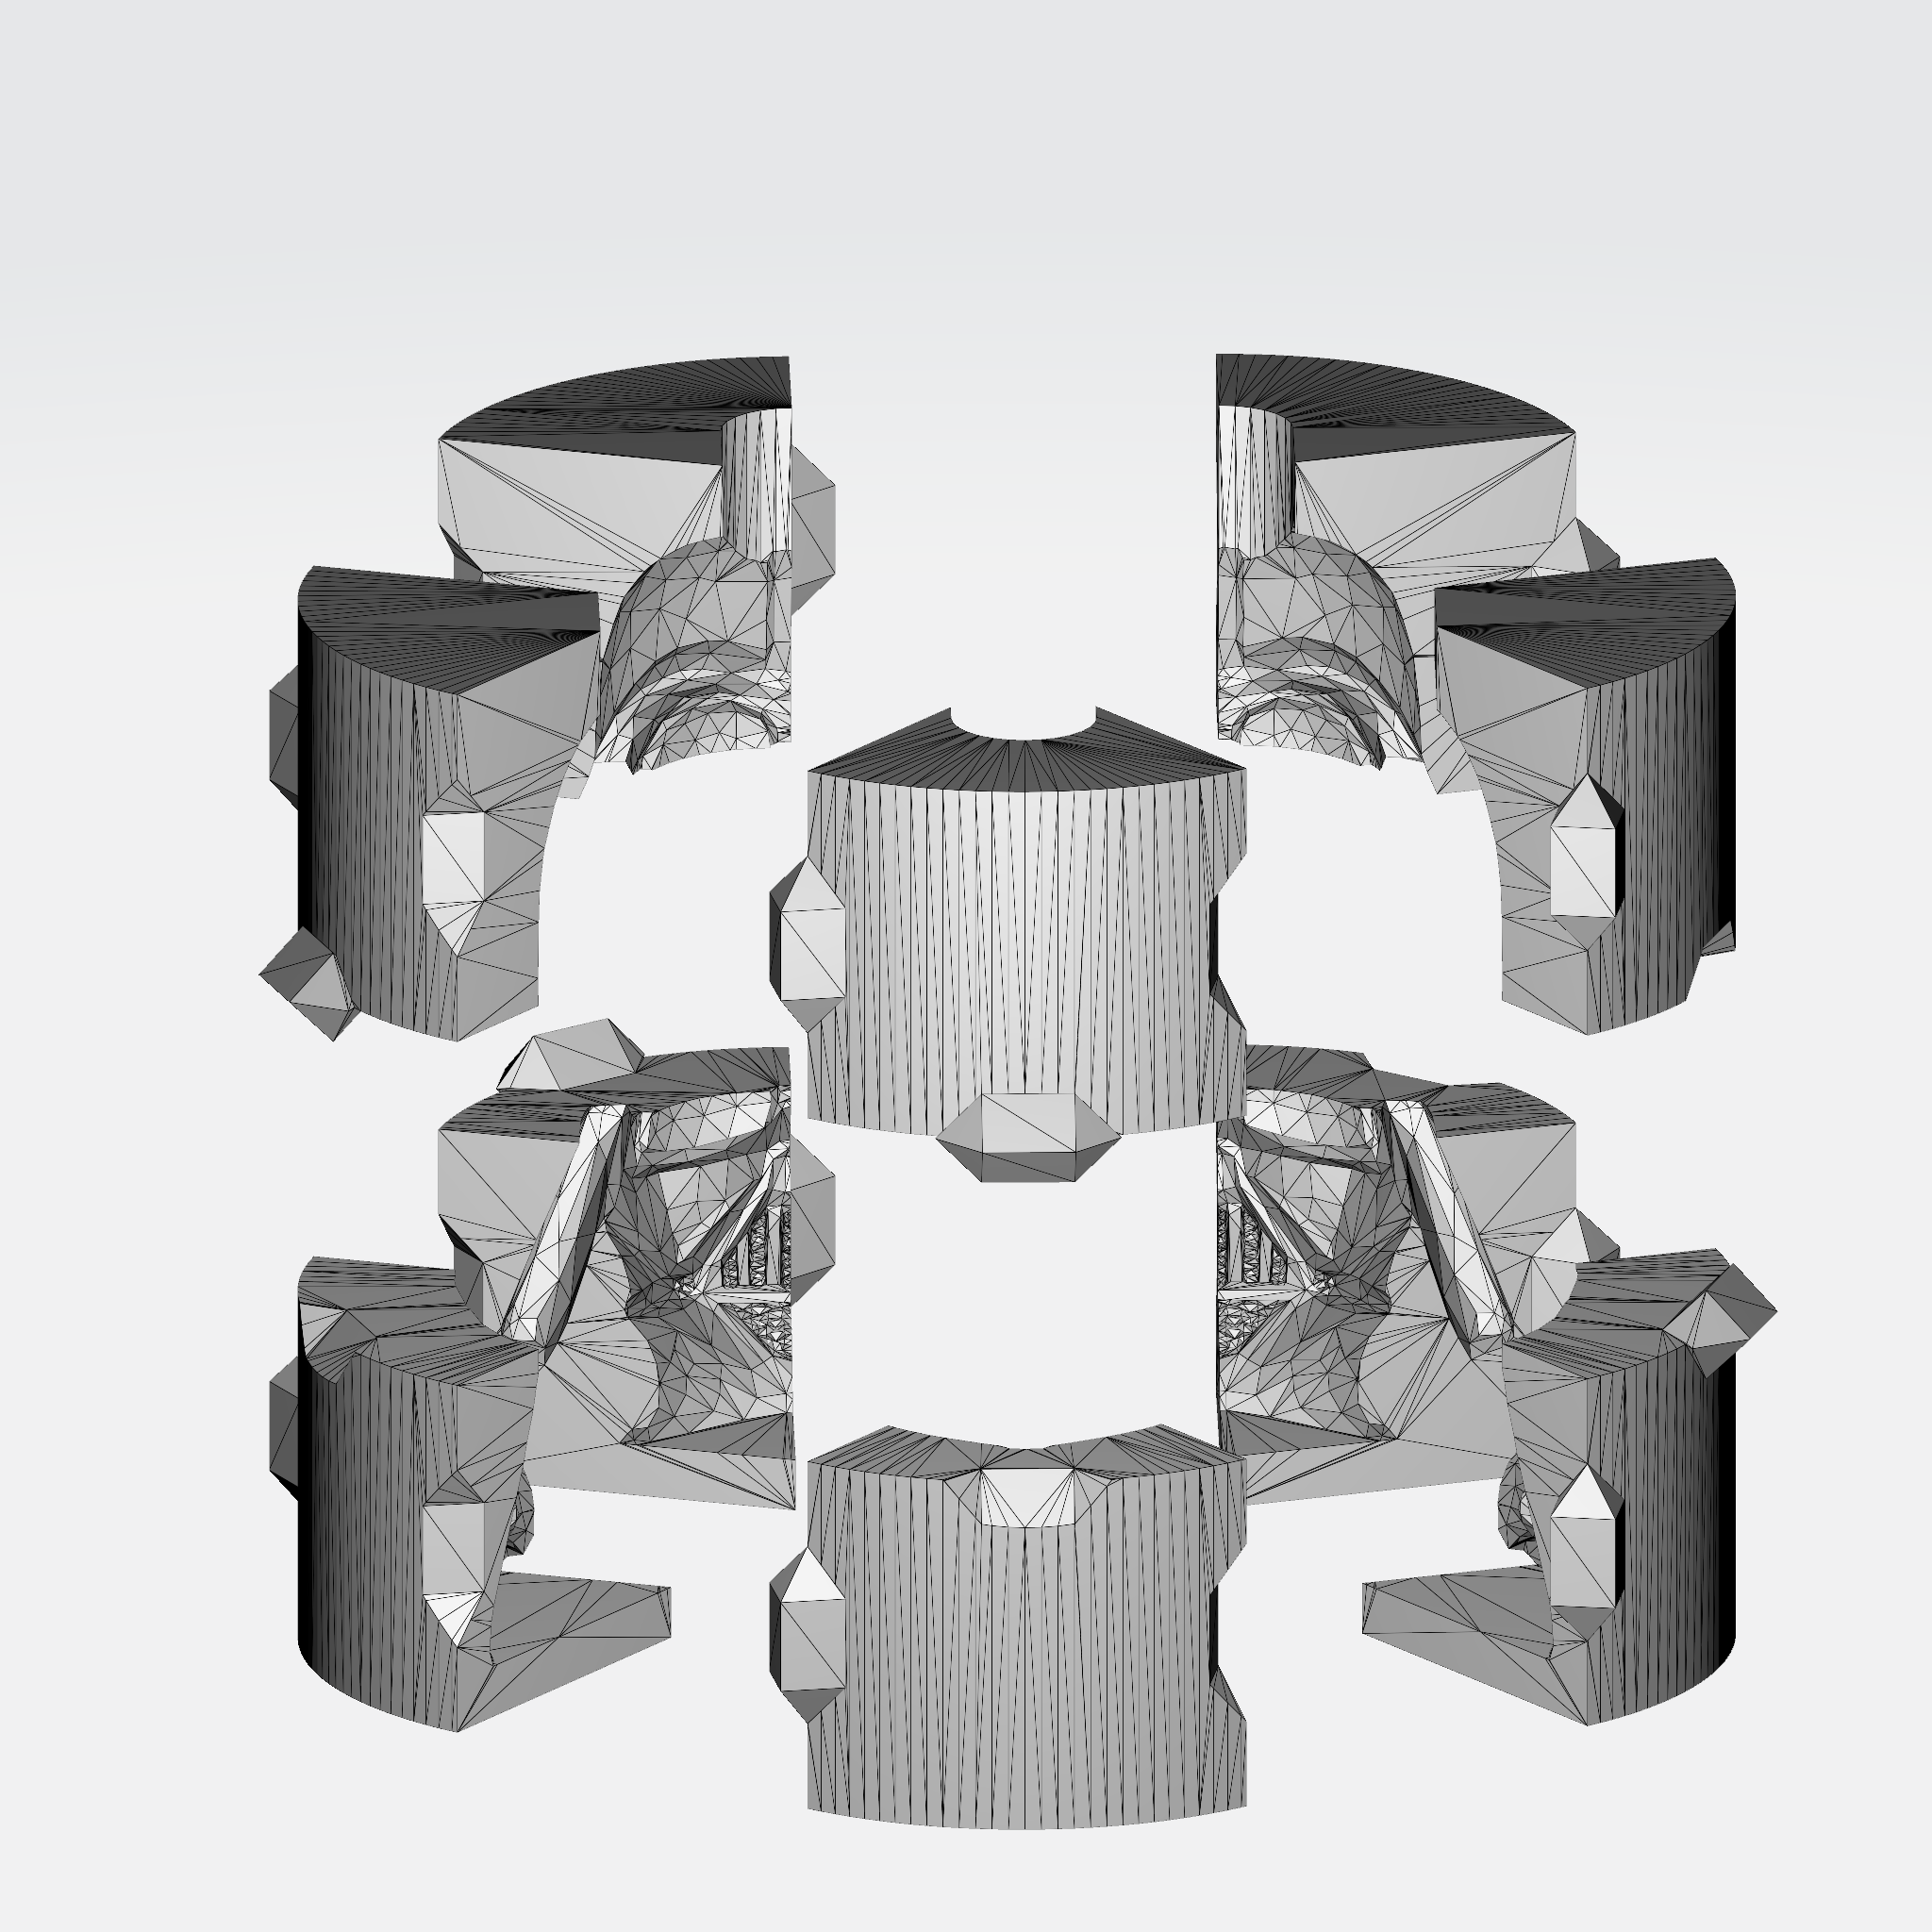
After a little bit of playing around, I had gotten to where I had a nice program (model? script? OpenSCAD feels like programming) that would load the model, subtract it from a cylinder, slice it up radially and vertically, and add some clippies for assembly.
I did end up using Blender a bit to alter the input model by thickening the flanges on the front/sides of Vader’s helmet since they otherwise would tend to get stuck and break off in the mold.
After a few iterations of printing and then ~freezing Vader in carbonite~ letting Vader chill with the butter for a few hours, the results came out pretty well.
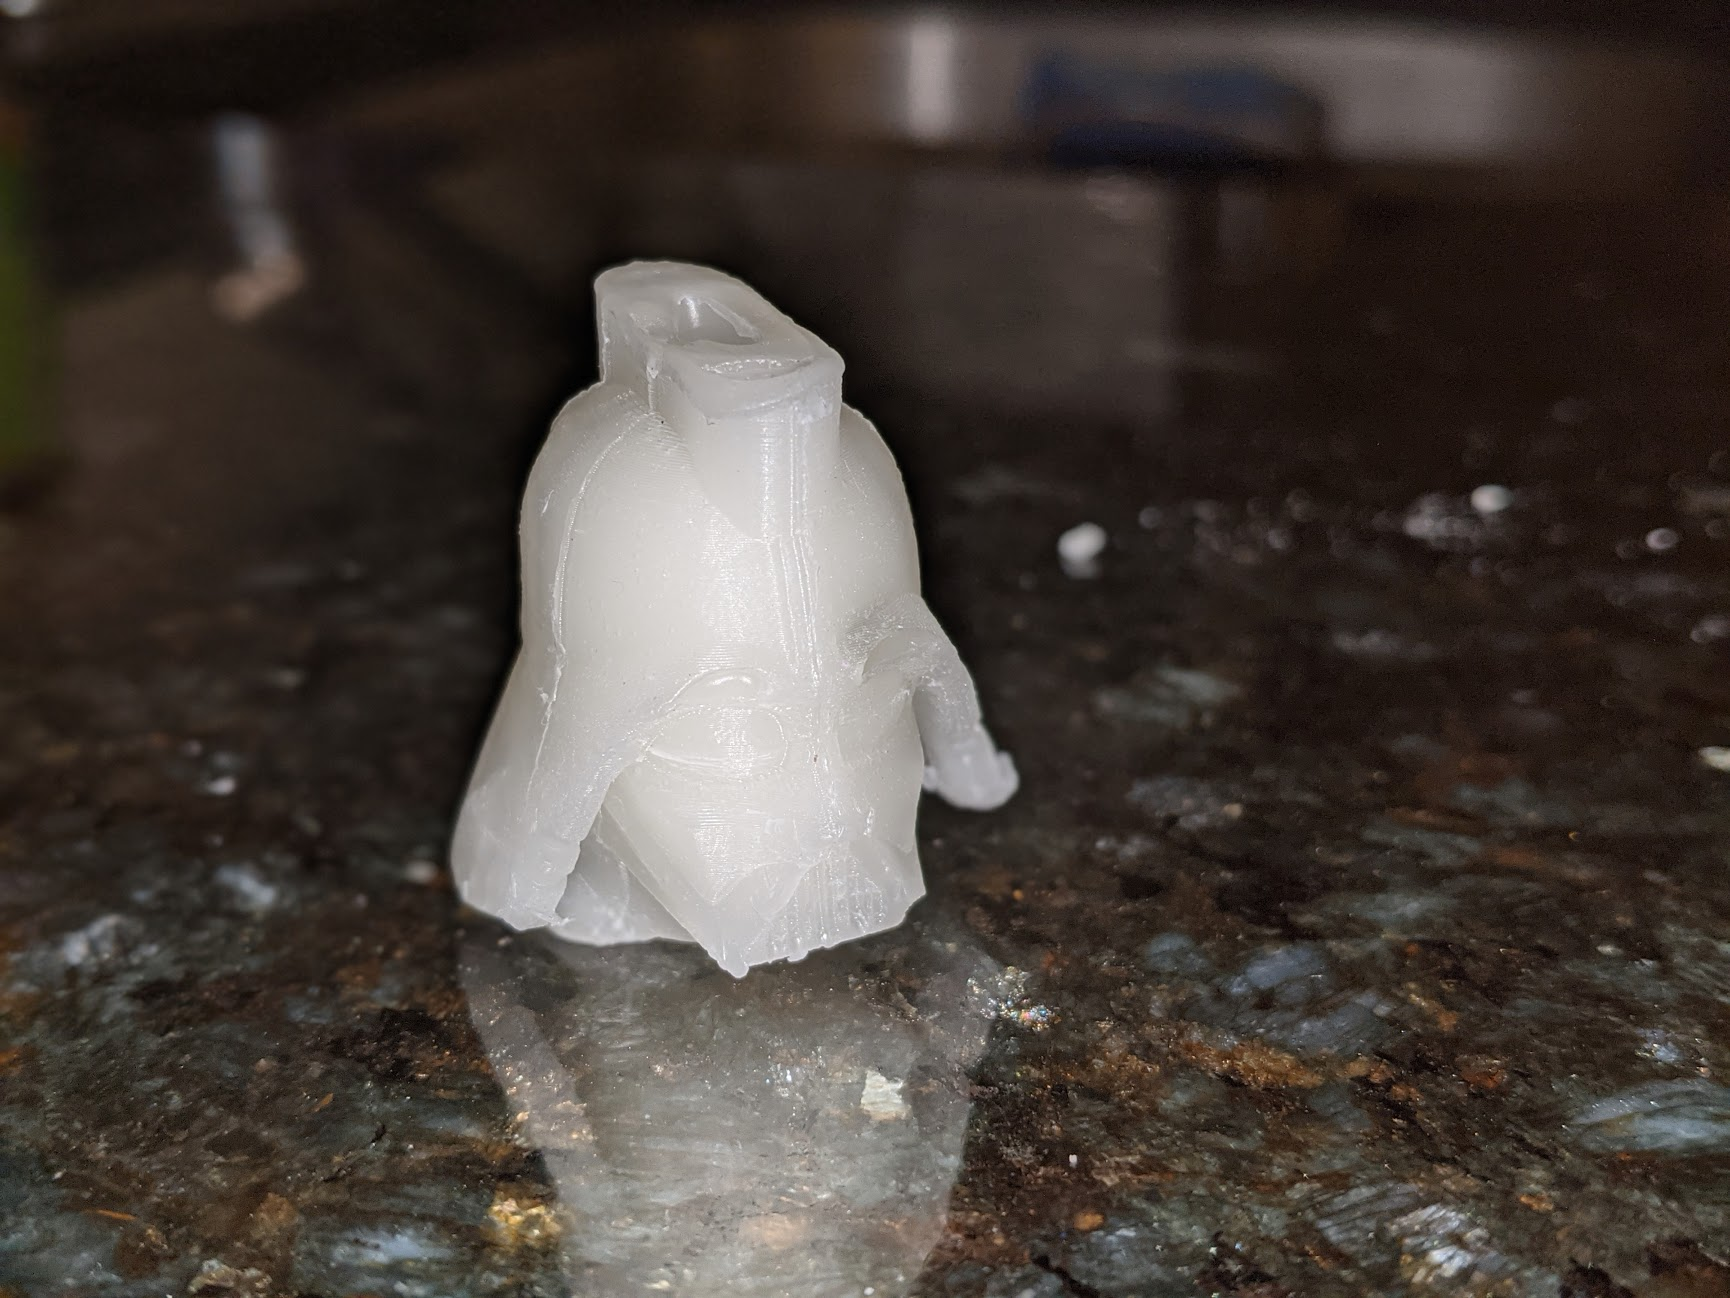
There were some voids, though, which showed up on the brows and extended a ways inwards (revealed by cutting Vader in half). These seem to be an artifact of making a small model and having a small pour hole, which causes the wax to cool and clog up the hole before the mold is full of wax.
Moving on from beeswax
One of the challenges of beeswax is that it is fairly sticky, and so difficult to remove from the mold once it solidifies. I decided to switch to paraffin wax instead since it (allegedly) releases a bit easier. I ordered a nice block on Amazon and a few days later I was in business. As a side note: a block is definitely the wrong form factor for was you’re gonna melt. I spilled a bunch of hot water and wax on my kitchen floor while attempting to shave pieces into the boiler over the stove. Note to self: next time buy pellets.
Moving on from Vader
Vader is great but as moldable objects go, he’s fairly complex. His helmet made for some nasty undercuts, even with some judicious alterations to the model. I decided to try something simpler.
Since my OpenSCAD program generates molds by slicing a cylinder up along horizontal and radial planes, it works best for things that approximately potato-shaped, i.e. round, though not necessarily uniform. I made my next attempt printing a storm trooper, again from a model on Thingiverse. I was able to reuse my OpenSCAD script with a few adjustments to scale and location.
Too many pieces
One of the nice things about procedurally generating 3D objects is that once you find the right formulas for where features go, you can go nuts on the parameters.
Though the Vader molds topped out at 10 pieces plus end caps, it seemed to make sense that more pieces = smaller pieces, and smaller pieces = less difficulty of removal.
I rewrote my script to be agnostic to the number of slices (by parameterizing it over the number of horizontal and radial planes) and decided 3 layers of 5 pieces would be a good place to start for the storm trooper helmet.
With 15 pieces, though, assembly of the mold was becoming a problem, as was figuring out which piece is which.
Luckily OpenSCAD has a text() function that allows you to extrude arbitrary text as a 3D object; by subtracting this from the outside of each piece I was able to label them all with their coordinates.
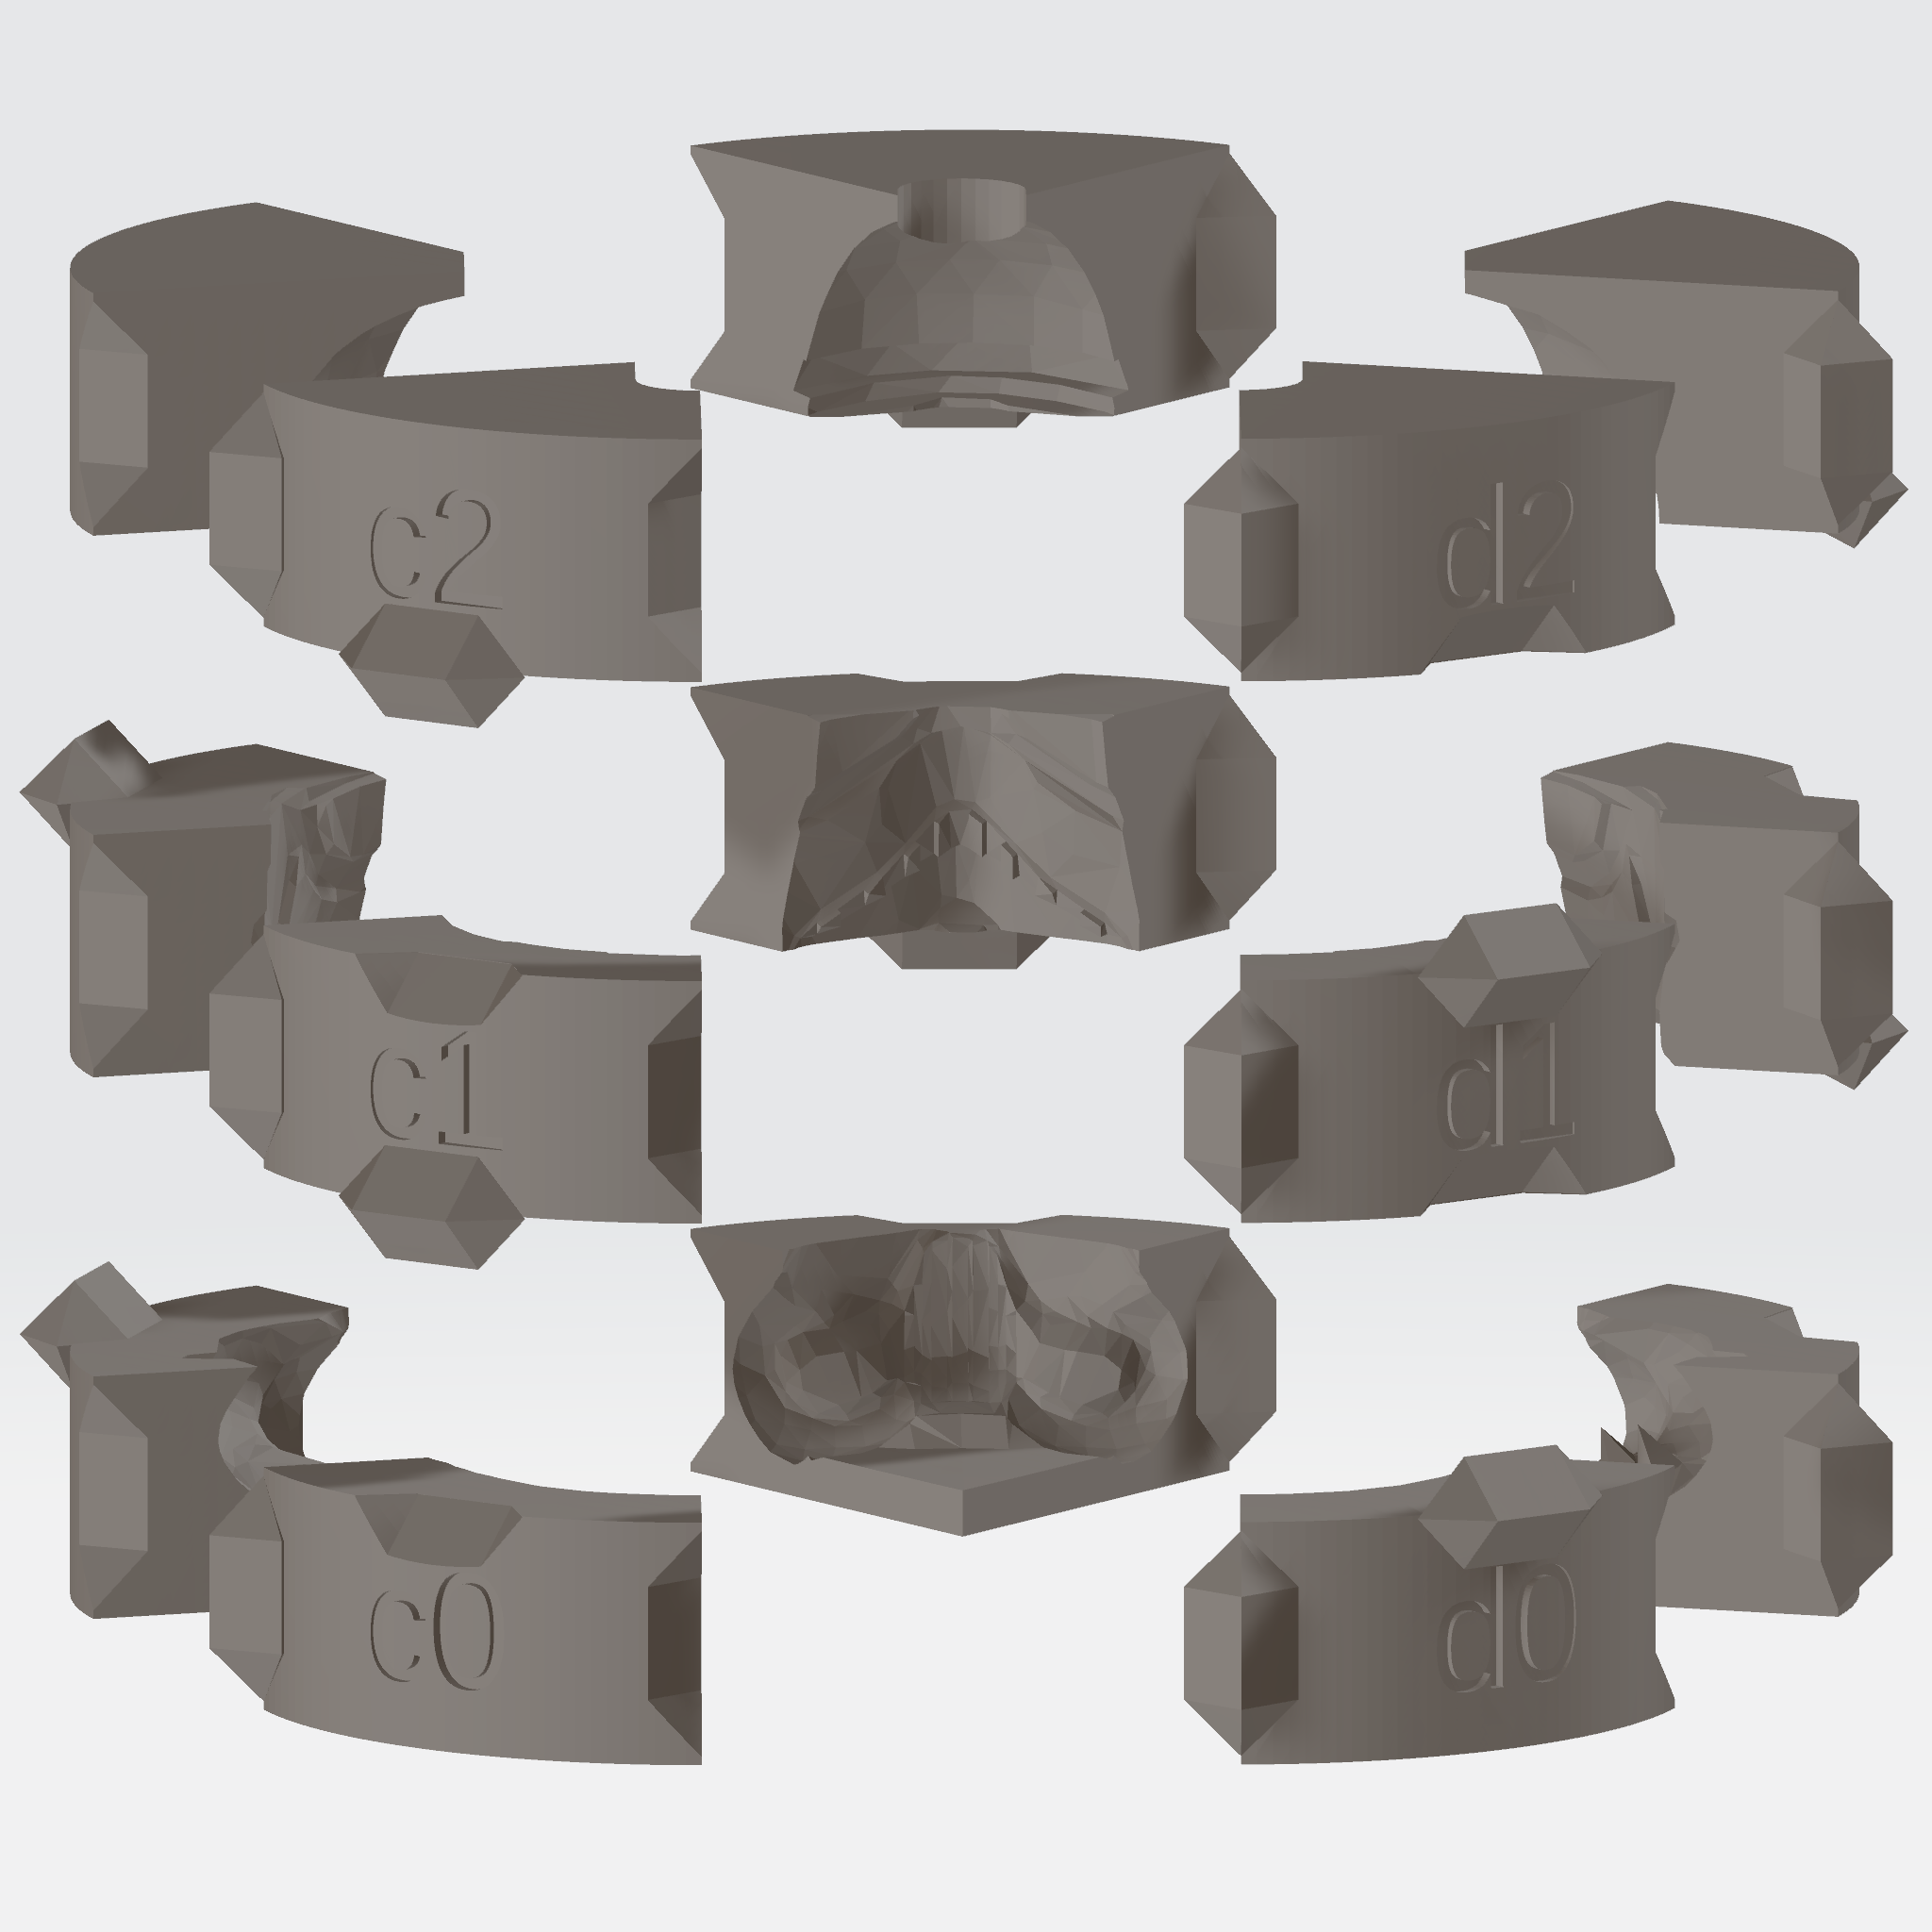
I also added code to generate an outer ring that slides down over the mold to hold it together radially. Rubber bands around the end caps provide the necessary axial force.
Storm trooper test pour
Once the mold was assembled, I melted some paraffin wax (and recovered from the aforementioned waxplosion) and began pouring. Hoping to prevent more voids, I started by swirling a thin layer around the entire inside of the mold. I poured the rest of the wax afterwards. I stayed liquid for quite a while, and the combination of the initial coat plus plenty of time for bubbles to exit seemed to preven any of the issues I saw with Vader. After some time in the fridge, and a couple more pours to fill in the crater that forms as the wax cools, I took off the mold. To be honest, I’m extremely pleased with the result.
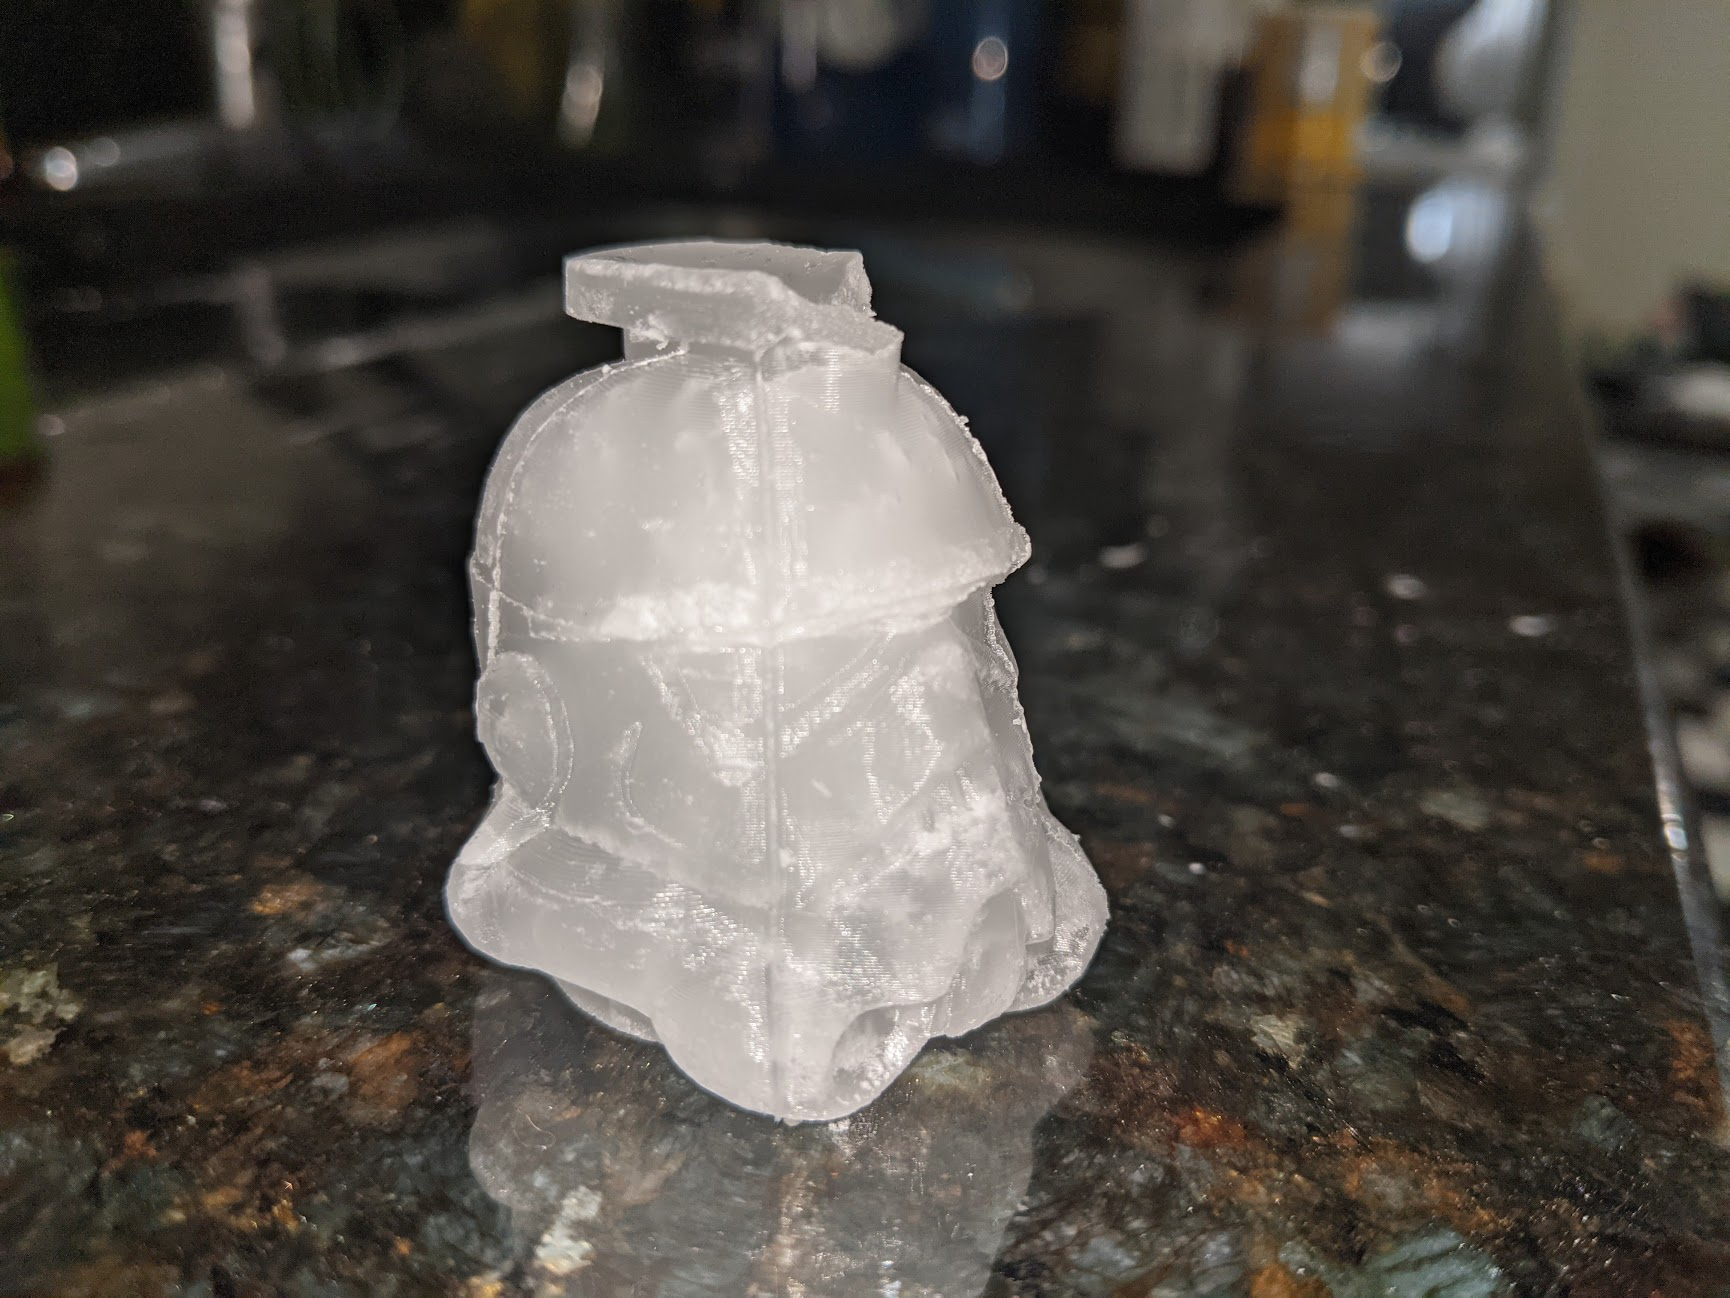
There is a little bit of flash around the seams that I need to remove by hand, but otherwise it’s great. The model is accurate enough that you can even see the layer lines from the print, which are pitched at .2mm. I’ll have to play around with finer-quality printing to see if I can make those disappear.